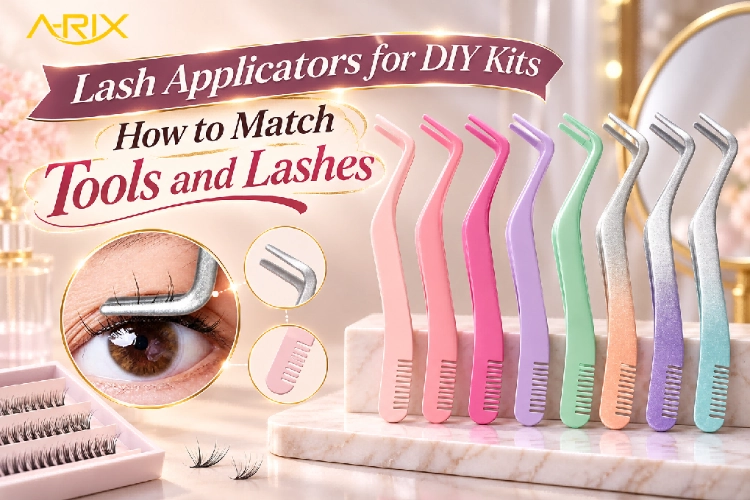
Which applicator belongs in your next DIY kit? The photograph gives you the color and a rough idea of the shape. To make the buying decision, you’ll need the lash tray on the desk as well. A broad strip, a tiny segment, and an applicator with a bent tip each bring their own awkward angles into that conversation.
Our recommendation for lash applicators for DIY kits is to buy around the job. Decide where the customer will grip the lash, put the proposed parts together, and work through the directions you plan to print. With a two-in-one tool, include the comb step in that exercise. You’ll soon have more to discuss with the supplier than whether pink or silver looks better.
For a private label buyer, this is a manageable piece of development work. The choices are small, but they sit right in the customer’s hands. Here’s how to give them enough attention before approving a complete set.
Start With the Lash in the Box
Where will the fingers and tip go
Put the filled tray beside the tool. Point to the part the customer is meant to hold. That simple exercise is worth doing with every format in the proposed assortment, because the words strip and cluster say very little about the gripping area on a particular product.
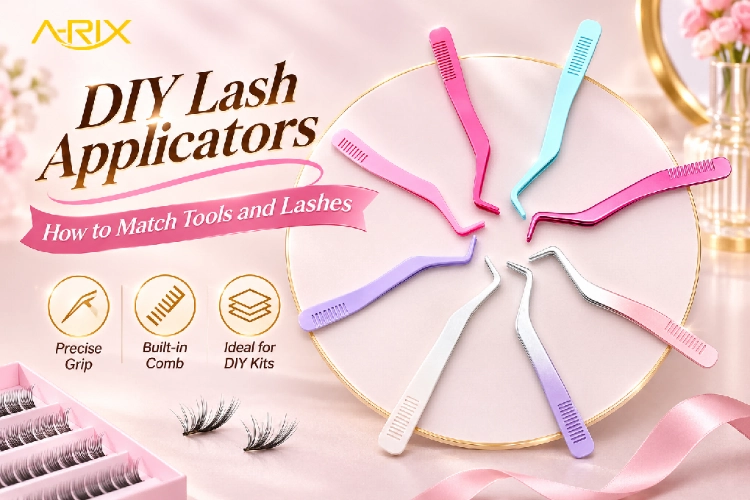
Take the A-RIX applicator with an integrated comb as an example of the format. Its stainless steel body has an angled gripping end. The product is listed at 12 cm long and 1 cm across the handle, so those are the dimensions to bring into the initial layout discussion.
Who is opening the box? Somebody buying their first set will read it differently from someone replacing a familiar tool. For the first group, the illustration may need to introduce both ends of the applicator. For the second, making the replacement easy to identify may be the more immediate job.
Make the comb function specific
Before giving the comb space on the front of the pack, decide where it enters the customer’s routine. Ask the supplier to demonstrate the proposed arranging task with your chosen lash. You can then photograph that particular step and use wording that belongs to the kit you’re selling.
Bring any included bonding product’s verified directions to that discussion. They affect the order in which the kit is used. This is much easier to settle while the directions are still a draft than after the leaflet has been printed.
Review How the Applicator Holds the Selected Lash
Look at the contact area
Look at the jaws closed, then look at them around the intended pickup point. Pay attention to the fibers immediately beside that point. If the tip reaches those first, take a photograph of the position and send it with the sample feedback. It gives the supplier something concrete to work on.
For example, suppose a segment turns sideways as it comes away from its holder. Make a note of where the tip was holding it. That gives the supplier a position to reproduce and discuss, including whether a different grip or tip shape belongs in the next sample round.
The smaller styles need a turn with the tool too. An assortment change later on is easier to review if the sample record identifies which lashes have already been tried. Leave room to add the next format when the range expands.
Review visibility from the user’s position
Then try the mirror view. From above, the camera can see around a handle that sits directly in the customer’s line of sight. The proposed working position is the view that matters here. Take it into account when choosing the tool and when deciding where the instruction camera should sit.
For the leaflet review, we’d involve a colleague coming to the kit fresh. If a picture makes sense only after its designer explains it, that picture needs another look. Keep the question the reader asked with the draft, so the next version can be checked against the same difficulty.
Give Finish and Grip Their Own Approval
Compare appearance under normal handling
Matte solid colors, gradient finishes, and metallic silver are among the options for the A-RIX reference tool. Order the finish you intend to sell as part of the sample discussion. Its reflections and surface appearance won’t be evident from a flat color swatch, especially on a narrow curved handle.
What happens when you turn the tool around to use the comb? Try that movement with the proposed finish. It’s a good opportunity to work out which angles need a close photograph. Ask the supplier for cleaning directions for that finish as well, so the leaflet can be prepared with the right wording from the outset.
You can bring another shape from the A-RIX DIY accessory range into the sample discussion. We’d compare it using the same lash first. Otherwise, a change of tool and a change of lash happen together, and it becomes harder to say which made the task easier.
Check branding where the customer will see it
View the proposed logo on a finished handle as well as in the enlarged artwork proof. Then put the tool into its insert. Can you see the mark in the position the customer first encounters? That’s a practical question for the filled sample, especially with a reflective finish.
Matching colors across materials also takes a physical comparison. Put the finished tool beside the printed card and insert. Agree the appearance you will accept for that combination while everyone can see the same sample, particularly if the collection relies on a coordinated pastel palette.
Design the Pack Around Both Ends of the Applicator
Allow for removal and replacement
Lay the applicator into the proposed insert with the bent tip and comb both visible. Where will the fingers reach to lift it out? Look at nearby lash fibers too. The cavity needs to hold the tool in a position that makes sense when the complete pack is handled.
Be specific in the packaging feedback. A marked photograph showing a tooth catching the insert tells the supplier where to look. So does a note identifying contact with the lid. Those details are easier to carry into the next sample than an overall comment that the fit could be improved.
A mirror, when included, belongs in the prototype too. Its position affects where the customer puts the open pack and how they reach for the tool. Keep the component versions together after this discussion, including the insert that was actually used.
Make the contents obvious in the listing
Give the retail listing a clear contents view as well as the vanity scene. The gripping end and comb deserve a closer picture if they carry part of the sales message. A buyer should be able to work out which lash and tool combination is supplied before opening the detailed description.
If the applicator is optional, say so beside the offer. A customer seeing it in the campaign photograph may reasonably look for it in the box. Put the supplied contents in the product description and pass the same list to distributors when handing over the images.
Put the Compatibility Decision Into the Purchasing Brief
By this stage, you should be able to hand a colleague the sample combination and explain why it was chosen. Put the lash reference and tool specification with the instruction draft. Include the packaging layout and its revision. That handover becomes the basis for the quotation and the next sample request.
For this A-RIX applicator, color, logo, surface finish, and packaging can be discussed as customization choices. Ask for the tool quantity and any finish-specific conditions on its quotation line. For private label lashes, the starting quantity is 1,000 boxes and mixed assortments are supported. Packaging has its own 1,000-box starting quantity, so the kit brief needs to account for both.
Color boxes, blister formats, and white cards are among the available packaging directions. First-round samples can normally be dispatched in around seven days, with sealed sample retention supported and bulk production matched to the approved reference. Include the tool and filled pack in that approval discussion.
Send the A-RIX team your kit development brief once the intended customer task is clear. Ask for a sample combination that can be reviewed as a complete kit. The commercial conversation then has a defined product, rather than a collection of unrelated component photographs.
Questions About Lash Applicators for DIY Kits
Does one applicator suit every lash format
That needs a decision for the particular combination. Try the intended grip with the proposed lash and directions, then discuss the observation with the supplier. If you’re adding another format to the kit, bring it into the sample round before describing the tool as suitable for it.
Should a two-in-one tool replace every other accessory
Choose the contents around the kit’s intended sequence. The integrated comb may cover a useful arranging task, while another accessory may still have a separate purpose. Include components that the brand can demonstrate and explain clearly, with directions appropriate to the actual products supplied.
What should a distributor request before ordering
Request the selected tool sample, filled kit, contents list, proposed branding, and packaging specification. Review those together before approving the assortment. The A-RIX product catalogue provides a starting point for selecting the lash and accessory combination to develop.
Before signing off, open the filled kit and read through its directions once more. You should be able to explain where the applicator enters the routine, which end is used, and how it is stored afterward. Keep that agreed combination with the order so the same discussion can be picked up when the kit changes.